
BPC presents – Chris Oaten : Live Music Photographer – 22-Oct-2015
Last week BPC had the honour to listen to Chris Oaten speak to us about live music photography. Accompanied by his wife Melody (who provided the background commentary), we had a very entertaining evening that inspired a few of us to take up our camera at a live gig or two.
Chris is a media professional with over 20 years in the industry. Starting from a base of journalism (reporter, writer, sub-editor) he has followed his passion of photography to become a full time professional photographer, is a member of the AIPP and in his spare time photographs live music (I’m sure he does other things in his spare time!). He has extended his knowledge with a TAFE course in photography and is now doing a Bachelor of Visual Communications at UniSA. The night he spoke to us he was due to go to 2am shoot at a construction project. That’s a pro.
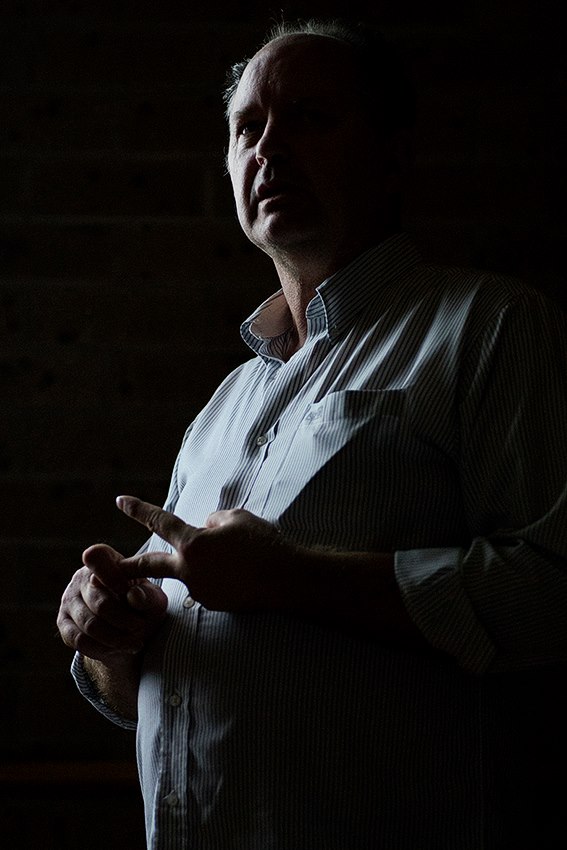
Chris Oaten at BPC (Ashley Hoff)
His range of professional work encompasses architecture, sport, travel, humans, commercial and time lapse images. He specialises in time lapse images around our fair city. To view the breadth of his work visit his website.
But as I said, in his spare time he likes to shoot live music with his trusty Canon 5D Mark III and some fast lenses (his range of lenses includes 24mm, 50mm, 70-200mm, 8-15mm, 16-35mm, tilt and shift 17, some Sigma Art lenses – you get the idea – but not all are used at music events). He does the music photography for professional development – not to make a living – which is near impossible these days. You can see some of Chris’s music photography on the Adelaide Music Photography web site he showcases his collaboration with Max Moore.
I’ve watched Chris in action around live music gigs – and to me it seems effortless and unobtrusive. In reality, there is more to it – and what follows is Chris’s take on how to shoot live music.
Chris started by giving a taste of the problems in photographing live music in pubs and has to deal with poor lighting (professional performers often have far better lighting and make the job easy – we were shown some images from a Tina Arena concert), crowded venues etc.
So here are the problems Chris sees – and his solutions:
- Don’t share boring photos!
- You aren’t doing any favours for anyone. So edit what you share ruthlessly and be prepared for harsh criticism.
- Remember, that your photos don’t have the music that goes with them, so they must stand on their own.
- That means they need to be in focus and they need have the action associated with the photo – singers need to be singing, musicians need to be playing their instruments.
- Don’t use on camera flash
- It is needed sometimes, but very rarely
- Don’t use high ISO where possible
- Cheaper cameras can’t do it well, it pushes inaccurate focus
- Hiding noise results in a compromise (over smoothing looks like plastic!). But there are ways to overcome this issue
- Understand your subject
- Good sports photographers often play the game, great nature photographers understand the animal and their behavior etc.
- So in the case of music, understand the dynamics of what is happening on the stage and apply it to the action.
- Not shooting enough frames
- Don’t use spray & pray – that high burst mode – as it will often waste time (eg as the buffer clears) and wear out the shutter sooner. Single shots are better.
- Remember that most of what is happening is out of your control
- To get the shots you need to be an aggressive shooter. What is that? Someone who moves around and makes the shot rather than someone who walks up timidly to the same spot, takes a few shots and walks away. Music photographers need to move around and capture the action, be involved, engage with the artists
So what is Chris’s style? Get in close, use the lighting to your advantage and use selective (ie shallow DOF) focus, often manually.
So what are his solutions?
How not to be boring
Live music is action photography. Instruments are being used. So get profile shots, stick with the subject as the action unfolds.
Bad lighting can be your best friend – it makes you work harder. There is no such thing as bad light – only bad photographers. Chris showed several example of this with the band Lucky 7 at a gig where there was one light behind the artists. Instead of abandoning the shoot, he used the light to create profiles and silhouettes. Think of old horror movies and how they were lit – the images had great power and atmosphere. Do the same.
On the other hand, daylight music festival are a breeze – but you still need to work hard.
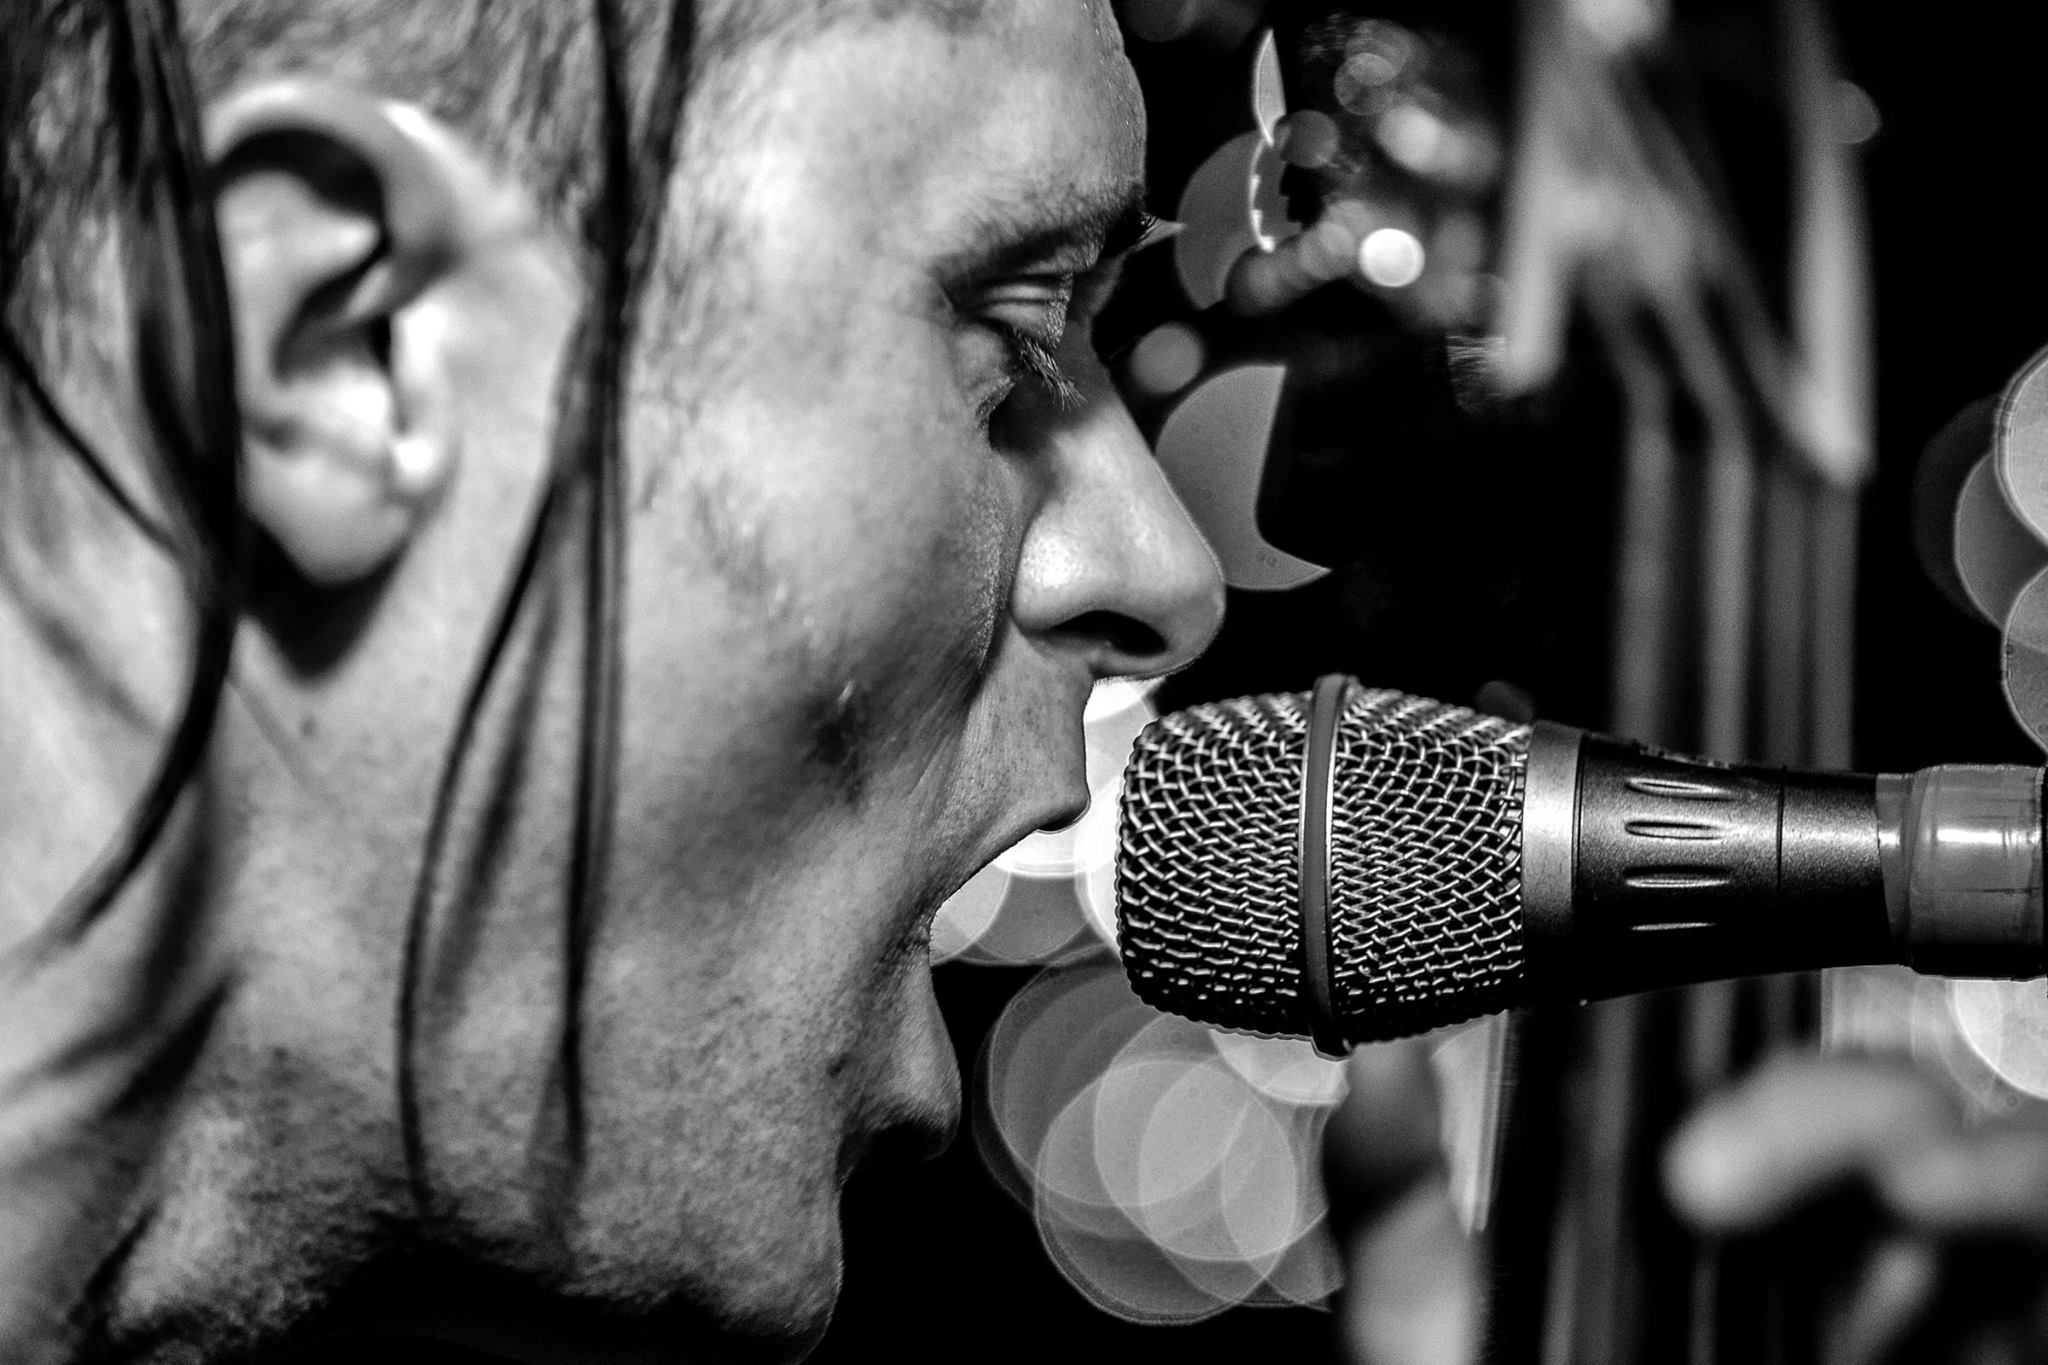
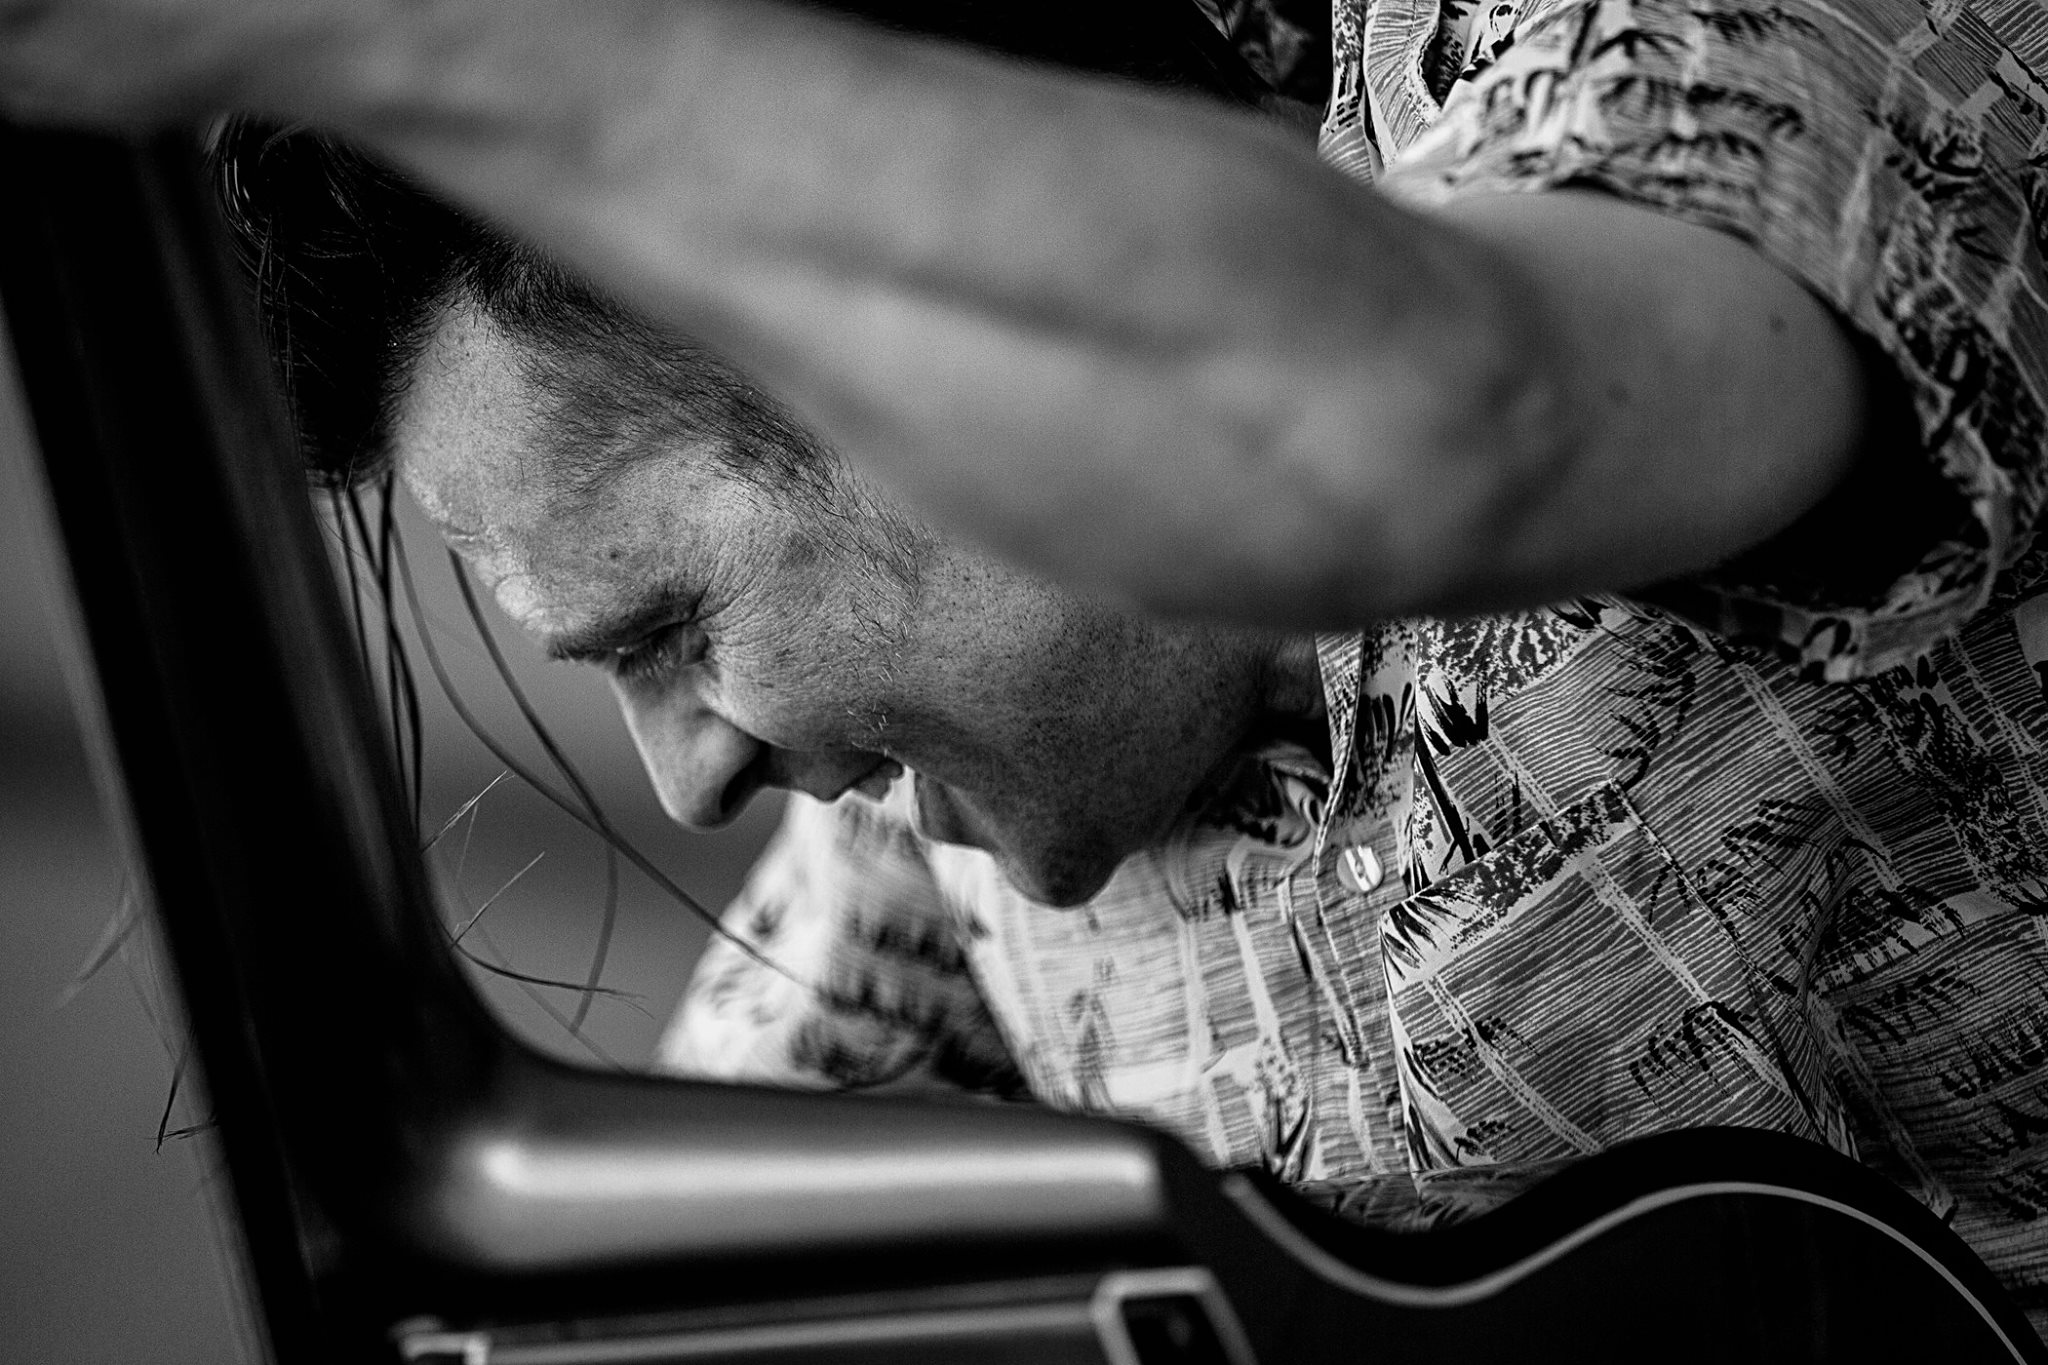
Steve Mitchell – by Chris Oaten
Change your position and angle of view. Use the stage equipment to help frame shots. Remember, the photo is telling a story so use the elements of that story. Chris showed us an example at the Semaphore music festival – which unfortunately for the organisers was held on a AFL Finals weekend. The crowd was a bit sparse, but by moving around the stage he was able to make it look busy (using the out of focus background and more crowd), show interesting on lookers, the artists in action from in front, behind and to the side as well eye contact with the artist to lend intimacy to the image.
He quoted photographer Berenice Abbott “photography helps people see” and illustrated this with some great shots:
- a young boy at his fathers gig enjoying the music whilst sitting on the floor
- The interaction of musicians on stage when not playing
- People dancing to the music (and those disconnected from the action) – the burlesque dancer picture
- Interesting people and characters
- Portraits of musicians that they actually like
It’s important to remember that good photographs are enhanced with details – they add depth. That means when taking photographs be observant. Some of the examples acutely demonstrate this:
-

Steve Mitchell – by Chris Oaten
Steve Mitchell from the rockabilly band The Satellites has hair that starts out controlled, but very soon is part of the act
- A musicians special moment – like Belinda Hartman – from The Satellites singing
- the musicians style of playing – like a trombone players blowing their cheeks (or giving cheeky looks) or guitarists with special (eg car seat belt) guitar straps
- Use
- compositional elements
- portrait shots of the performers
- (our tired old friend) the intersection of thirds
- selective focus
- the Golden Spiral – where a photograph spiraled in to one person in focus around the instruments and equipment on stage
- close up features of the instruments or instruments being played (trombone players, guitarists – but drummers are difficult!)
The trick here is to apply what you learn – don’t just be a technician. As Chris said, don’t just be a wood pusher in a chess game (ie know the moves but don’t develop new strategies). In photography, pixels are free, so don’t be a shutter pusher.
How to use on camera flash
Flash does have a role in anti-establishment genres such as Punk and Ska. It is harsh lighting, but can work in such genres. However, at other times it rarely works well.
It’s often better to have off camera flash – and even combine flashes. Chris illustrated this with an image of lighting reflected from a white wall behind the performers onto which the flash fell – much more depth than a straight flash onto the performers.
If you must use flash, use a an orange or yellow gel to warm it (flash can look very cold) – don’t use green or blue. You need to be sympathetic to the available light too – don’t overwhelm the stage lights.
And use the lights to go for drama – like silhouettes or use the light to make more reflections – such as brass instruments.
How to handle high ISO
You’ll need to do some testing of your own camera gear and work out it’s noise signature. What is acceptable and what you can tolerate. Chris rarely goes above 3200 on his Canon 5D Mark III.
Here are the steps:
- Place your camera on a tripod in a lounge room and shoot some still life. An 18% grey card may be helpful too
- Shoot images at each ISO from 800 to your camera’s maximum
- Evaluate the resultant images and determine what is acceptable to you
If you are using high ISO, make sure you have fast lenses – f1.8, f2.8 etc – like his 70-200 f2.8
One simple solution is to purchase a 50mm f1.8 lens second hand – there are plenty about (I confess to having a nifty 50 f1.4 myself) – that will give you a lens that is fast and flexible.
ISO changes are needed depending on the speed of your subject – a Bob Dylan is ok with slow ISO, but Mick Jagger needs higher ISO and shutter speeds.
Now the tricky bit – professional events have good lighting – pubs have cheap lighting. Usually LEDs and that is hard to work with. So work with the light – use blur, have long exposures to add a dynamic element.
How to work with your subject
When photographing live music you need to know what is going on – understand the dynamics of the performance.
You first need to understand the genre. Once you’ve got that, then think about the parts of the performance.
There are verses and choruses. So you’ll have a group in a chorus, but the main performer in the verse, or a solo instrumental. Knowing how performers work and when they are likely to do something can help.
For example Steve from the Satellites (who is a double bass player) often has a big finale – time your shots for events like that. Lucky 7 have a horn section who will play together – use that.
Drummers are often left out of shots, but they do some interesting things (Chris has got know a couple and now interacts with them whilst shooting). Pick the player most likely to give you a performance.
But always be respectful of the performer. Don’t embarrass them.
How to shoot more frames
You need to commit yourself to chase the right frame and for fast action.
Most performances are 2 hours – which is 7200 seconds. After most shows Chris has about 1000 shots in the camera. That’s about 1 shot every 7 seconds. But not every shot is a winner – and some shoots the band might be having a bad night, so getting good shots is difficult.
Many bands will be slow to start (or nervous) – so don’t shoot song 1 – wait for song 2 or 3. Be patient.
Final words and where to start
Chris never shoots with any supports like a monopod – all hand held. That is part of being respectful of the audience. They are there to hear the band or dance or both. So don’t get in their way.
Some gigs require a media pass – if the band is signed to a label or it is a major event like WOMAD (who are very restrictive). The Roller Derby in Adelaide has photographers sign their rights away. In some cases your copyright may be lost – but that is another major discussion!
Venues such as The Gov are accepting of photographers if it is a local band. However, to be safe, contact the venue or the band. Many local bands don’t mind – and if you share the images they might even get you back.
And remember a big camera can be seen as problem by some venues – even if you are an amateur.
So there you have it – a great night, lots of useful information and a really entertaining evening – finished off with cake, cups of hot beverage and lots of chat. Many thanks to Chris and Melody for sharing their experience – we hope to have Chris back as some stage to share his other photographic skills with us.
Cheers
Chris 🙂


